Raw data
With the MS2 receiver you can record raw data in the proprietary “ubx” format through the open source Android app RTKGPS+ and then convert it to RINEX format with free tools.
Note
RINEX, Receiver INdependent EXchange format, is a file format for storing data from satellite navigation systems. The RINEX standard allows data to be stored and exchanged regardless of the receiver used to take the measurements. Data stored in RINEX format can be post-processed to obtain a more accurate solution, usually with the help of additional information that was not available at the time of the survey, coming for instance from measurements and models of the atmospheric conditions.
RTKGPS+
The RTKGPS+ application is an open source project based on the well-known open source software RTKLIB, updated to work with u-blox F9P modules.
This application uses the “Navi” module of RTKLIB, which allows RTK geolocation with a u-blox (or other) receiver, connection to an RTK base over the 3G/4G network and the recording of static or kinematic sessions.
The application can provide a mock location, so that the smartphone no longer uses its internal receiver but the external antenna, which means the geolocation service works with centimetre accuracy.
In detail, RTKGPS+:
- Can run in the background
- Has a fairly simple interface
- Can save the position history in a .pos file
- Can act as a data server or as the client of a tracking server
Initial settings
- Allow unknown sources on your Android system:
- Download and install the application from this link or from this one.
- Download and install the application from the Google Play Store
- Enable the developer options so that you can use mock locations
- Enable developer mode:
- Enable the “mock location”:
- Disable Wi-Fi positioning to avoid position jumps:
Installation
Download settings.zip and drop it into the RtkGPS folder of your Android device; it configures itself when the app is restarted.
Start the RTKGPS+ application
In the left-hand menu, scroll down and tap Load settings
When the message window disappears, close and reopen the application so that the new settings are taken into account.
Reopen RTKGPS+
Grant the app permission for data storage and location
Tap the RTKGPS+ logo to reach the parameters
Tap Processing options. Add Beidou to the GNSS systems
In the Ambiguity resolution settings apply this configuration:
- Tap Solution options
- Select Generate mock GPS positions
- Clear Enable test mode
- Tap Input stream to enter the configuration parameters of the rover and of the base, as in the video attached
- Set the values as in the settings.zip file
- Start the server
Starting the session
With the open source RTKGPS+ application, let us see how to record raw data in the proprietary u-blox format (ubx) directly on the Android device, and then how to convert it to the international RINEX format (observation + navigation).
On your Android system:
- Start the app and choose Input streams (1) from the context menu on the left
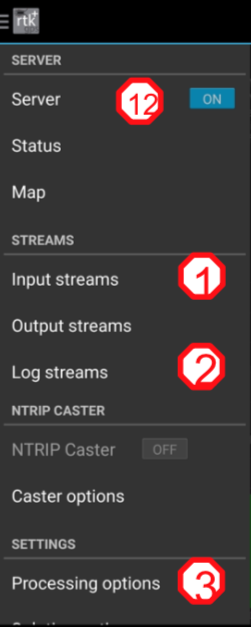
Fig.1 RTKGPS+ menu bar
- Under Type (4) choose the source of the incoming data (Bluetooth or TCP/IP, for example) and the stream setting (5) — the connected device, or the IP address and port
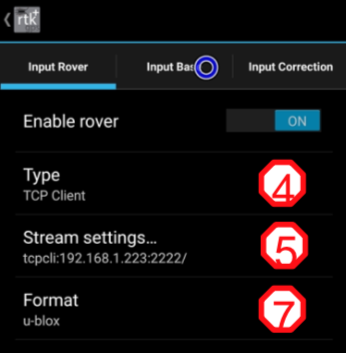
Fig.2 RTKGPS+ rover settings
- Set the format of the data coming in (7) from the device (u-blox in our case)
- Leave the base input “OFF”
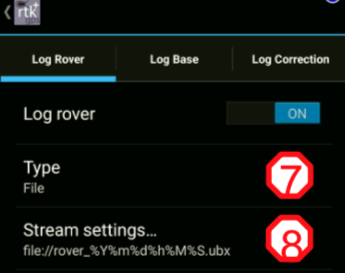
Fig.3 RTKGPS+ rover log view
- Under Logstreams:
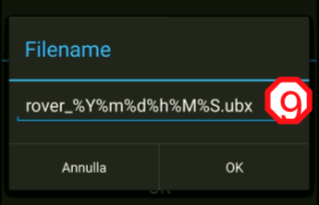
Fig.4 RTKGPS+ saving the rover log
- Then under Frequencies set L1+L2+L5 (11) (see Fig.5)
- (see Fig.5)
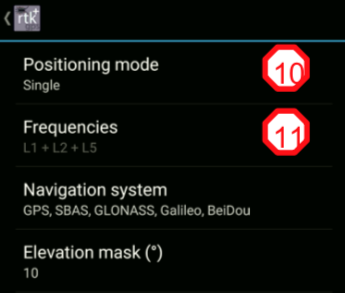
Fig.5 RTKGPS+ Processing options
- Go back to the main menu and start recording by tapping Server “ON” (12) (see Fig.1)
- When the service starts you will see the satellites being tracked, as in the figure below
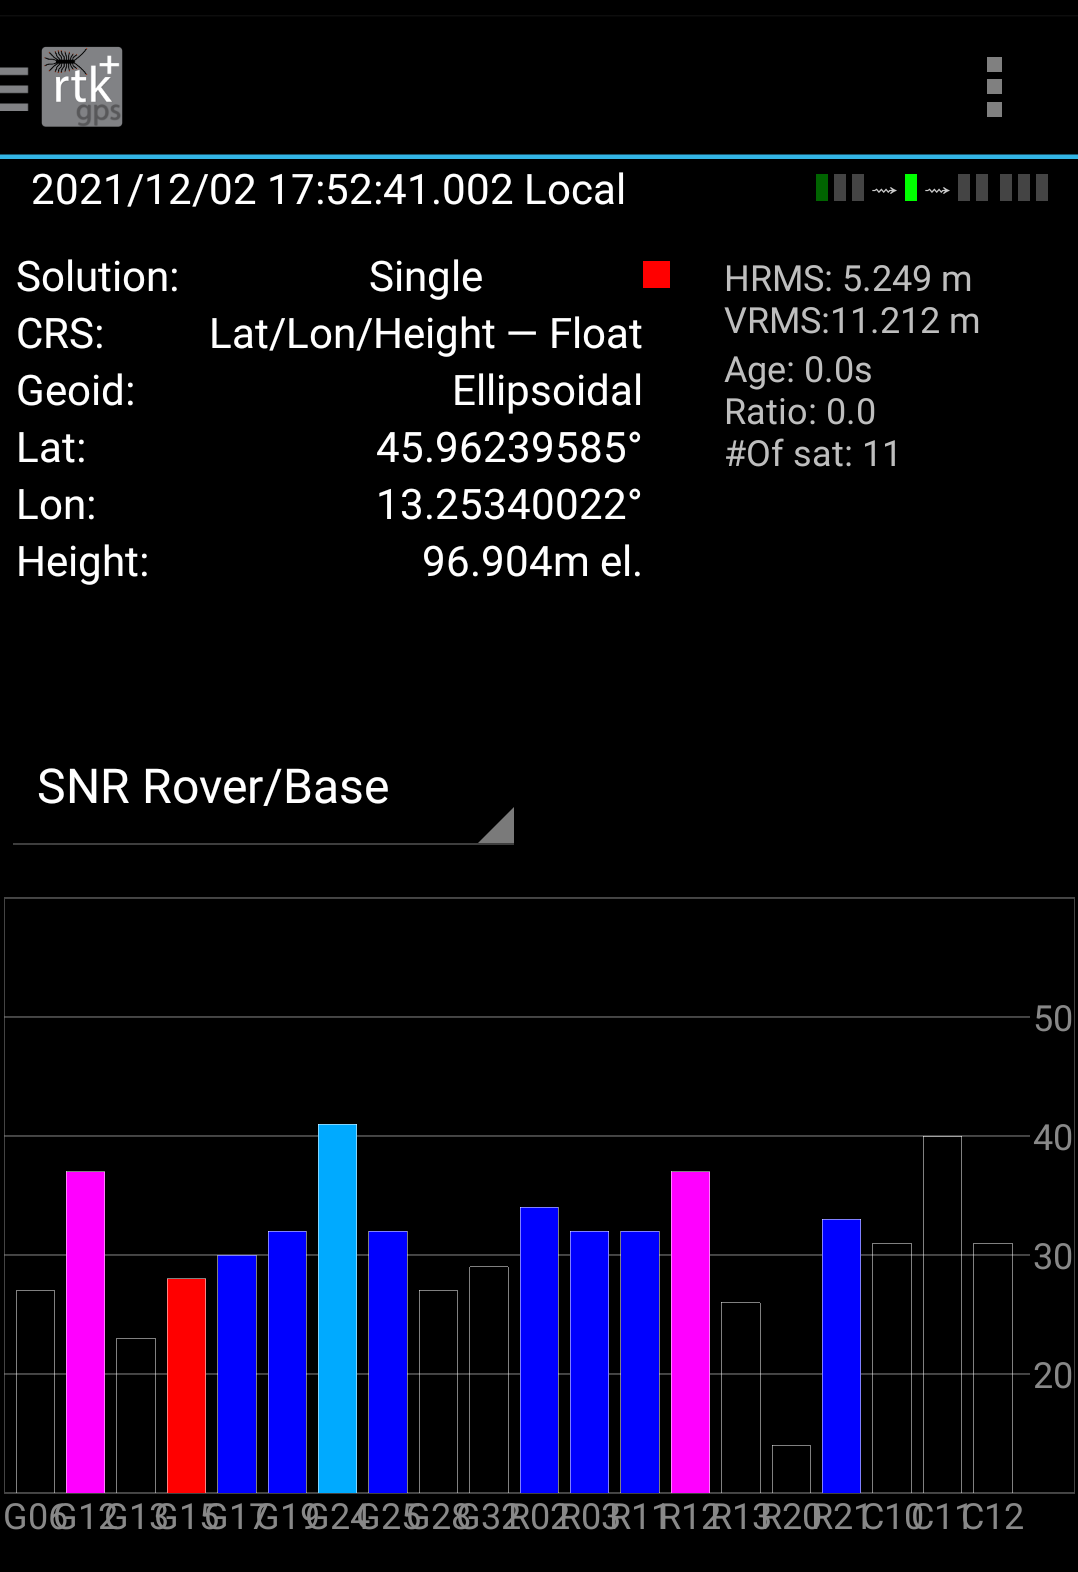
Fig.6 RTKGPS+ starting the service
Hint
Wait a little until a reasonable number of satellites is available and tracked
Downloading and converting the raw data
- download the data to the laptop, that is the recording file inside the folder called RtkGps on the Android device
- open the open source RTKLIB desktop suite and start the Rtkconv tool, which converts our file from the proprietary ubx format to the international RINEX format

Fig.7 RTKLIB main window
- drag the proprietary UBX file into the RTCM, RCV or RINEX OBS ? field (2) (see Fig.6)
- choose the destination path for the obs (observation) file and the nav (navigation) file (3)
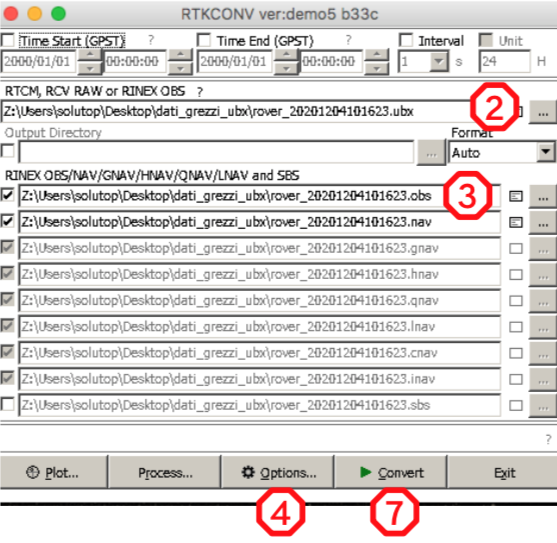
Fig.8 Rtkconv, adding the UBX file
open “Options…” and set them as in the figure below:
- use only the GPS constellation for the subsequent post-processing (5), so clear the other constellations under Satellite System in the options
- leave the use of the two frequencies L1 and L2 unchanged under Frequencies
- click Ok to confirm
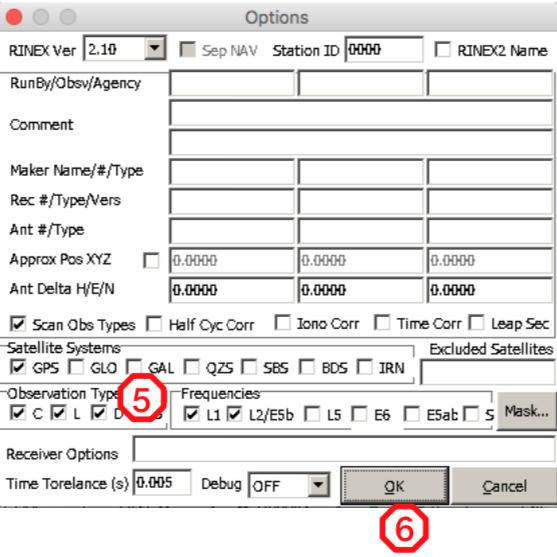
Fig.9 Rtkconv, setting the parameters
After the conversion you will have two new files:
- XXXXX.obs (observation)
- XXXXX.nav (navigation)
Hint
The obs file can be renamed XX.o: no observation data is lost
Video
How to record raw data and download it for use with RTKLIB, in this video
raw2g0
The Android application raw2g0 was built specifically for the forestry officers who will carry out the IFNI with the MS2 GNSS system, to record a raw static GNSS session very simply for later post-processing.
Features
- Connection to an Android device over classic Bluetooth
- Recording of raw data sessions in .ubx format
- Files saved in daily folders
Note
The session is recorded in the proprietary binary “ubx” format inside a folder created for the day of the survey, so that all the stations recorded on the same day end up in the same folder.
Requirements
raw2g0 currently runs on devices with Android 7 and later. To record the file you need an external GNSS device with Bluetooth switched on and already paired.
Warning
Always make sure the receiver is configured so that the Bluetooth stream is in UBX or UBX+NMEA format.
If you want to use several apps with different streams, binary and NMEA for instance, make sure the receiver is configured correctly before recording the session: to transmit both, you can set the receiver to the mixed UBX+NMEA stream.
If that stream carries no binary UBX data (only NMEA, for instance) the recording will be spoilt and no conversion to a RINEX file will be possible.
Tip
You are advised to set your Android device so that the screen timeout is at its maximum value.
At this link there is a short video on how to set the mixed UBX+NMEA stream and save it in a configuration file ready to be reloaded in future.
Installation
- Download it from
here - Install the app on the Android device
- Start the app
- At first start-up, allow access to Bluetooth and to files if you are asked to
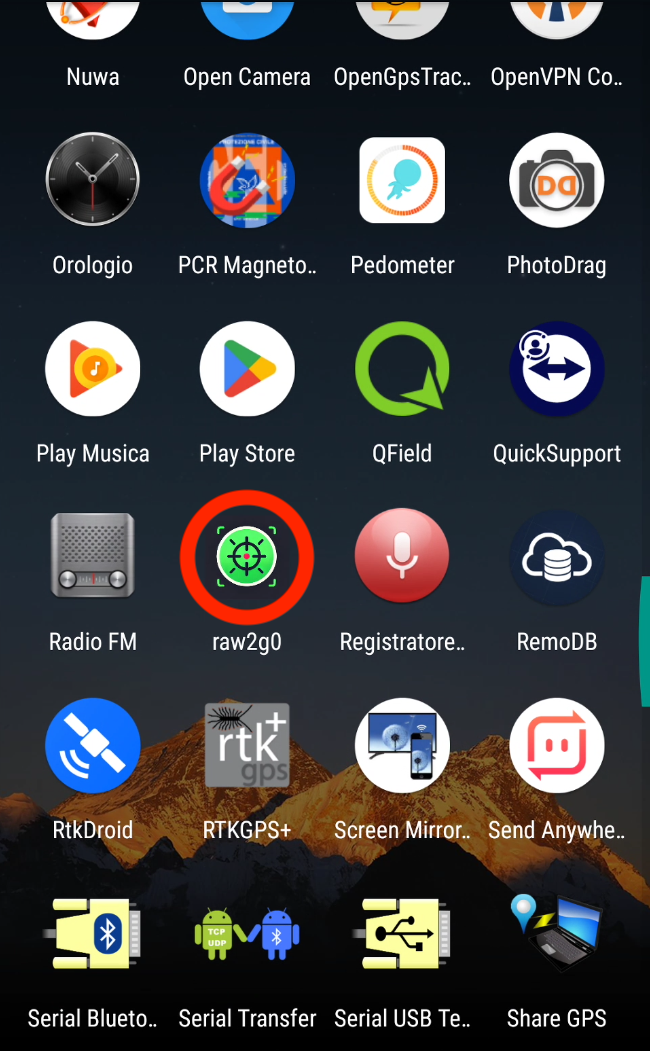
Fig.1 Icon of the raw2g0 app
Use
The procedure for a static survey with raw2g0 is described below. The steps are very simple, but they have to be followed carefully:
- when the app starts, connect the receiver to raw2g0 over Bluetooth with the “Select Device” button, the only green icon available, showing the devices
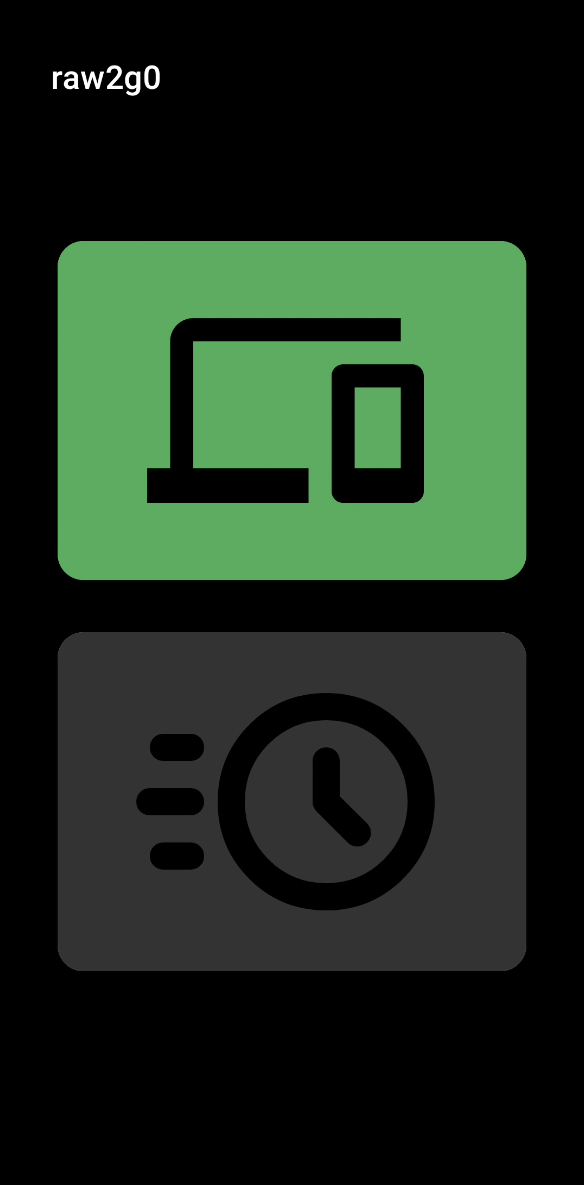
Fig.2 Opening screen
- tapping it brings up the list of the Bluetooth devices already paired
- tap the one you want, which must be available, switched on and already paired
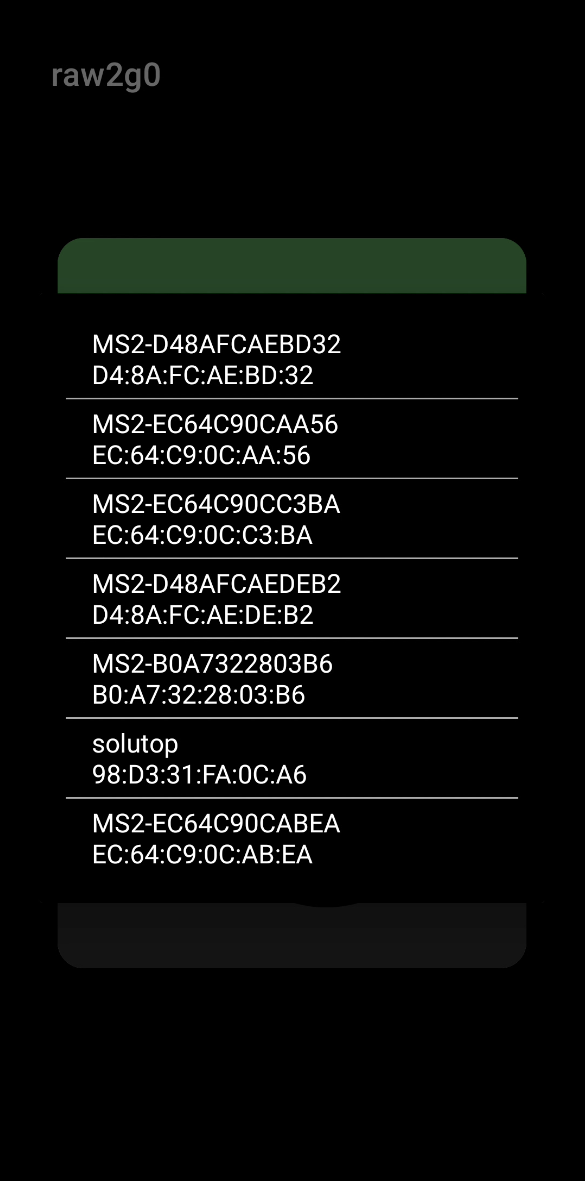
Fig.3 List of the available devices
- start recording by tapping the “Start Recording” button, the red icon showing a clock with three small lines on the left
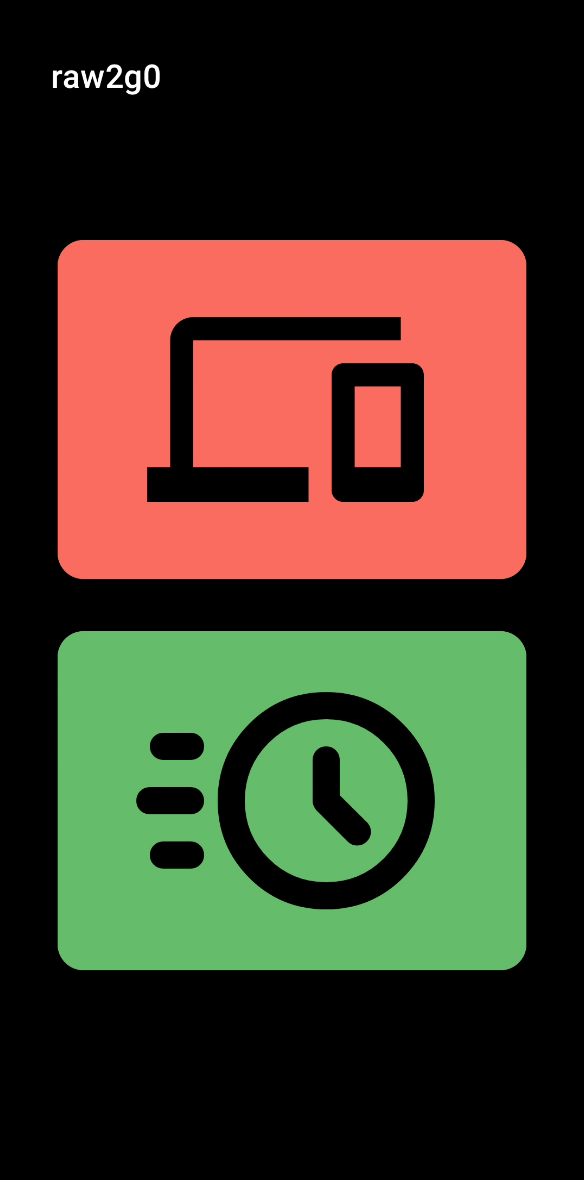
Fig.3 Starting the session
a window appears in the middle of the screen where the parameters can be set:
- enter the name (compulsory, alphanumeric and without spaces) of the station to be surveyed
- enter the countdown, in seconds, of the occupation time on the station (e.g. 1800 s = 30 min)
- tick sound if you want to be warned with a sound when the recording ends
- tick vibration if you want to be warned with a vibration when the recording ends
- tap “OK” to start recording (countdown)
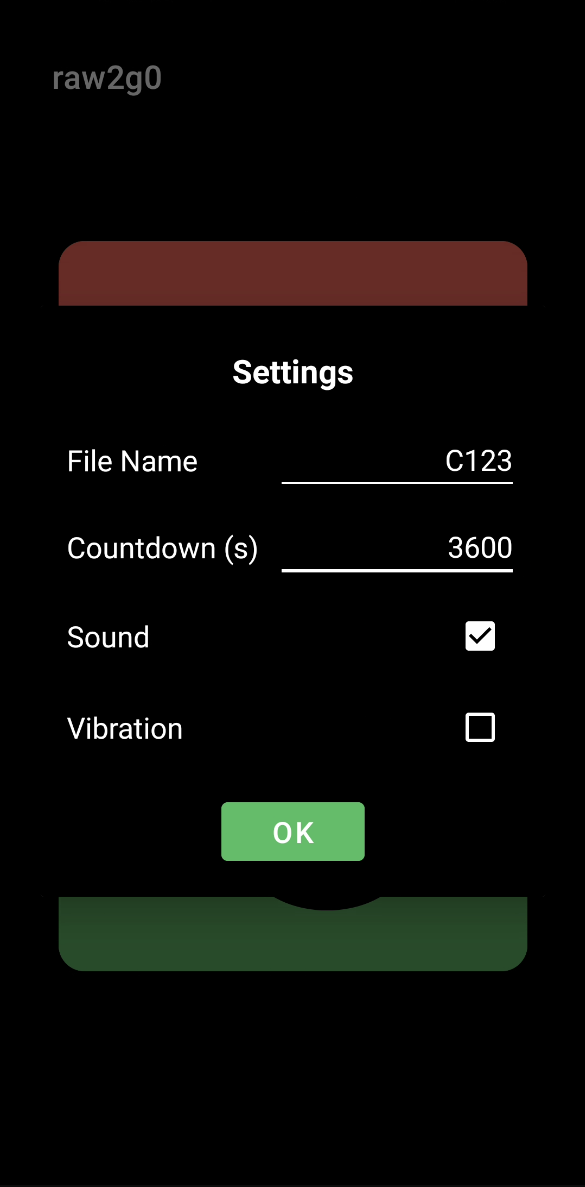
Fig.4 Setting the parameters
- recording starts, the “Start Recording” button turns from green to red and a countdown is shown inside the button itself
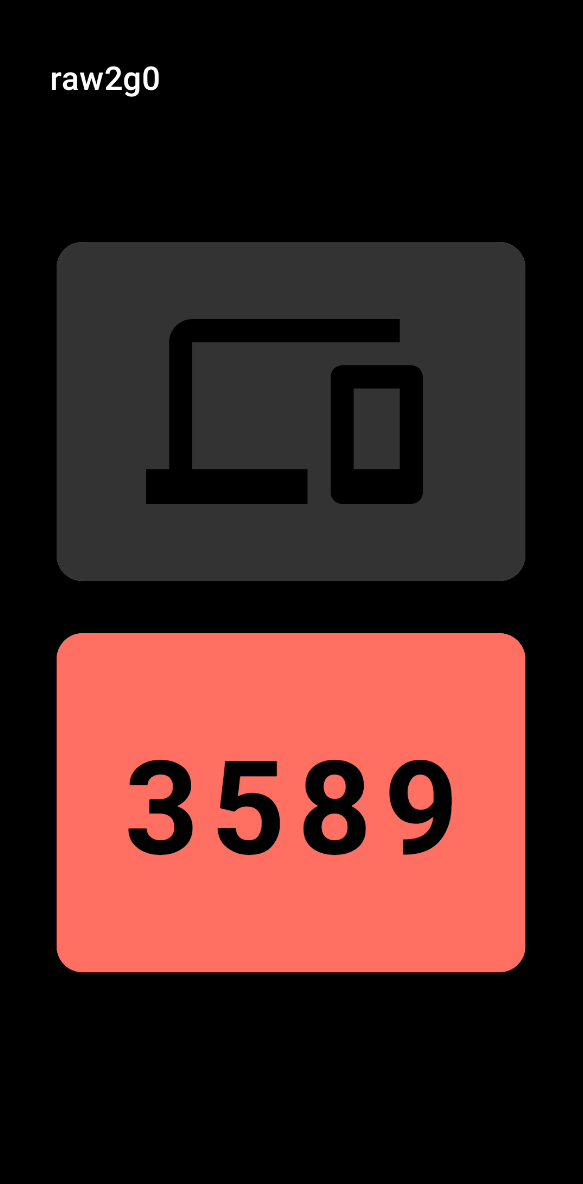
Fig.5 Countdown
- at the end, a warning (if it has been set) tells you that the recording is over and the screen goes back to the state shown in figure 3, so that you can go on with another recording
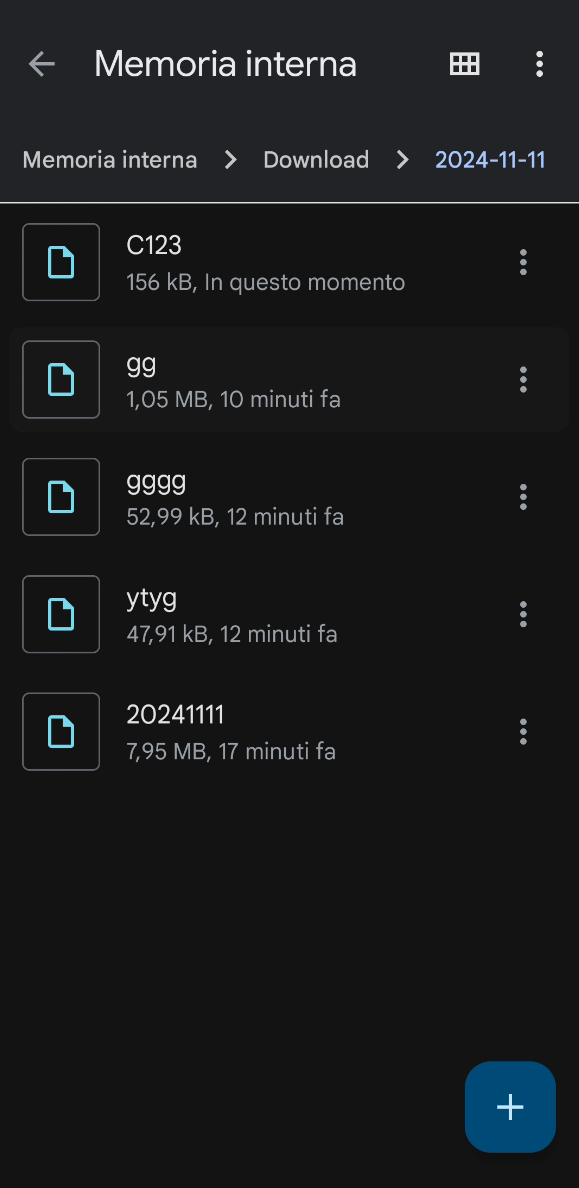
- the session is saved automatically in a folder named after the day (e.g. 2024-09-25)
Tip
Should you not want to wait for the occupation time set in the countdown, the recording can be stopped at any moment with the “stop” button. The session stops as soon as you tap it, but it is saved all the same
Video
A video showing the features described above is here.
rawX
rawX is a free, advanced Android application designed specifically for technicians, surveyors, researchers and, more generally, for anyone working with high-precision GNSS systems. The app records raw data from external GNSS receivers over a classic Bluetooth (SPP) connection and supports several operating modes to suit different professional situations.
Features
Classic Bluetooth (SPP) connection to external GNSS receivers
Recording modes to choose from:
- 🧍 Static: static acquisition over a preset interval
- 🚶 Kinematic: acquisition while moving, over a preset interval
- 🧍🚶🧍 Stop&Go: timed acquisition, point by point
Point name (static, kinematic) or name of the first point (stop&go)
Instrument height in metres, for the measurement of the point or of the ground track
Customisable countdown in seconds for the static or kinematic sessions and for the stops and goes of the stop&go sessions
Clear user interface:
- Buttons that change with the state
- Colours and texts updated in real time
Built-in “About” window with information about the author and a clickable e-mail address for direct contact
Data saved automatically to files in the Download folder, named after the exact moment they were saved (.ubx for the raw data and .csv for the session log)
Audible and tactile feedback at the end of the sessions
Compatible with professional GNSS receivers (u-blox and others)
No Internet connection needed
Requirements
rawX currently runs on devices with Android 7 and later. Minimum requirements:
Android device with classic Bluetooth enabled
Operating system: Android 7.0 (API 24) or later
Free space on internal storage to write the files
Permissions required:
- Bluetooth and Bluetooth Admin (up to Android 11)
- Bluetooth Scan and Connect (from Android 12)
- Location access (needed for Bluetooth)
- Read and write access to external storage
To record the file you need an external GNSS device with Bluetooth switched on and already paired
Warning
Always make sure the receiver is configured so that the Bluetooth stream is in UBX or UBX+NMEA format.
If you want to use several apps with different streams, binary and NMEA for instance, make sure the receiver is configured correctly before recording the session: to transmit both, you can set the receiver to the mixed UBX+NMEA stream.
If that stream carries no binary UBX data (only NMEA, for instance) the recording will be spoilt and no conversion to a RINEX file will be possible.
Tip
You are advised to set your Android device so that the screen timeout is at its maximum value.
At this link there is a short video on how to set the mixed UBX+NMEA stream and save it in a configuration file ready to be reloaded in future.
Installation
- Download it from
here - Install the signed APK on your Android device
- Grant the permissions requested at first start-up
- Start the app
- At first start-up, allow access to Bluetooth and to files if you are asked to
- Check that the GNSS receiver is switched on and visible over Bluetooth
- Connect the device with the “Select Device” button
- Select the recording mode you want
Version 1.5: (latest)
Wider Bluetooth device compatibility. The app now recognises and connects automatically to GNSS receivers whose Bluetooth name begins with MS1, as well as the MS2 already supported. This includes the MS1 and MS1mini series.
Antenna offset selection. A drop-down menu has been added to the Static/Kinematic and Stop&Go settings to select the GNSS antenna offset. The offset is the vertical distance between the antenna reference point (ARP) and the phase centre. Preset offsets available:
- No offset - no correction (0 mm)
- MS1/MS2 - standard offset for MS1 and MS2 antennas (63.5 mm)
- MS1mini - offset for the MS1mini antenna (46.9 mm)
The selected offset is added automatically to the instrument height you enter, so you only have to enter the height measured from the ground to the antenna reference point.
Managing custom offsets. The “…” button beside the offset menu opens the offset management screen, where you can:
- See all the available offsets
- Add new custom offsets (name and value in mm)
- Delete custom offsets (with a confirmation prompt)
The preset offsets are protected by a padlock icon and cannot be deleted. Custom offsets are saved and stay available across sessions.
UTC shown in the CSV files. The timestamps in the exported CSV files now state explicitly that they are in UTC:
- Session header: # Start (UTC): and # End (UTC):
- Stop&Go data column: Timestamp(UTC)
This removes any ambiguity about how the recorded times should be read during post-processing.
Version 1.4
- Bug fixes
Version 1.3:
- Visual countdown alternating between “CHECK” and the remaining seconds while the data is being checked
- Prevents the user from interacting during the critical stage when the device connection is being verified
Version 1.2:
- connection screen revised, with a check on the incoming UBX stream, and various bugs fixed
- Bluetooth SPP connection exclusively for MS2 devices
- new USB and TCP connections added
- interface improved, with differently coloured buttons
- the session can be shared without using a cable to download the data
- general bug fixes
Use
Start the app from the icon that has just been installed, as in the figure below
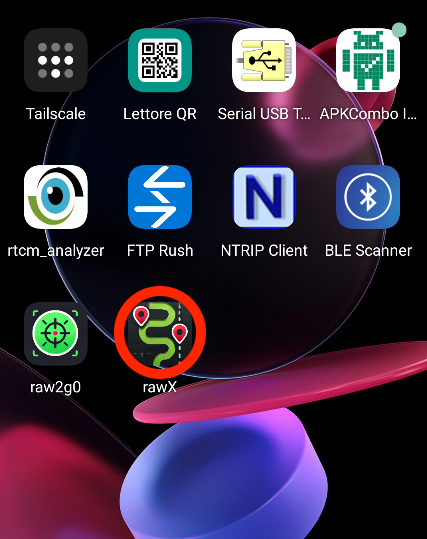
Fig.1 Starting the rawX app from its icon
When it starts, rawX shows an animated splash screen with the loading percentage of the software
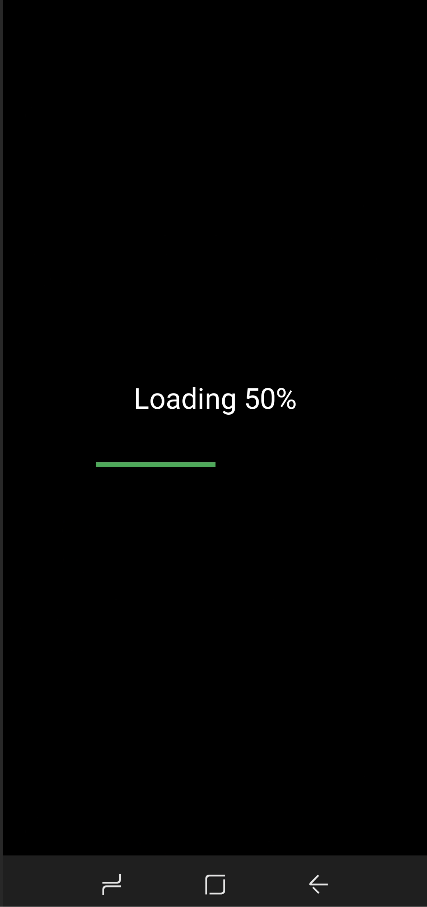
Fig.2 Initial splash screen of the rawX app
You can then select one of the operating modes, Static/Kinematic or Stop&Go
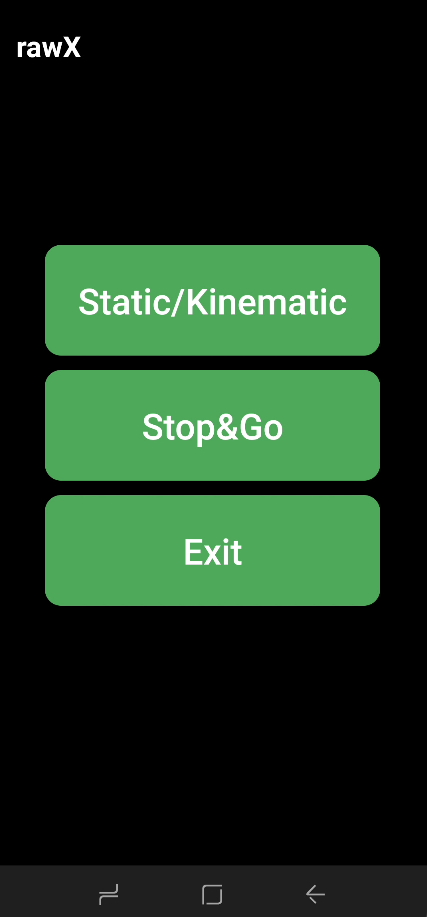
Fig.3 Choosing the operating mode
Static/Kinematic mode
With the “Select Device” button, connect the app to the receiver over Bluetooth
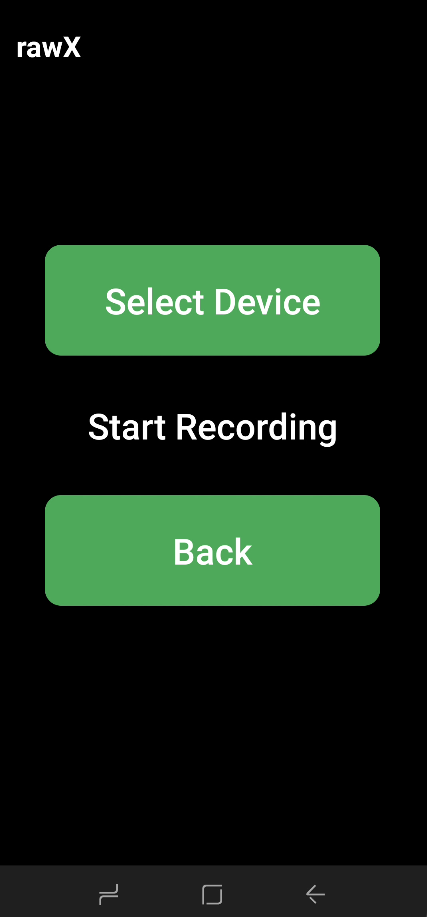
Fig.4 Selecting the external device over Bluetooth
Choose a device already paired over Bluetooth
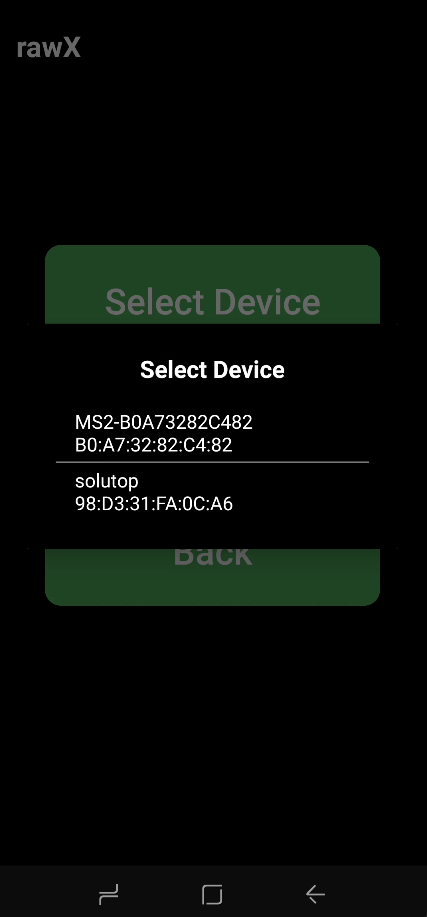
Fig.5 List of the available paired devices
The connection has a visual countdown
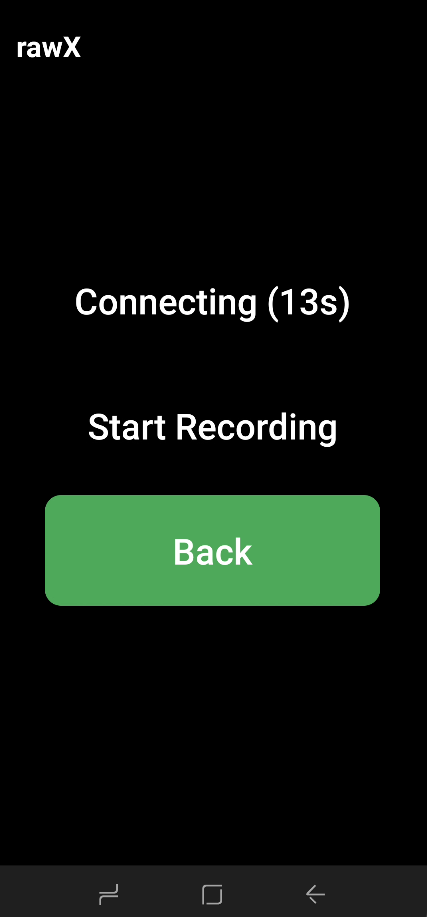
Fig.6 Connecting to the external Android device
Once the device has been chosen, in Static/Kinematic mode you can start recording by tapping “Start Recording”
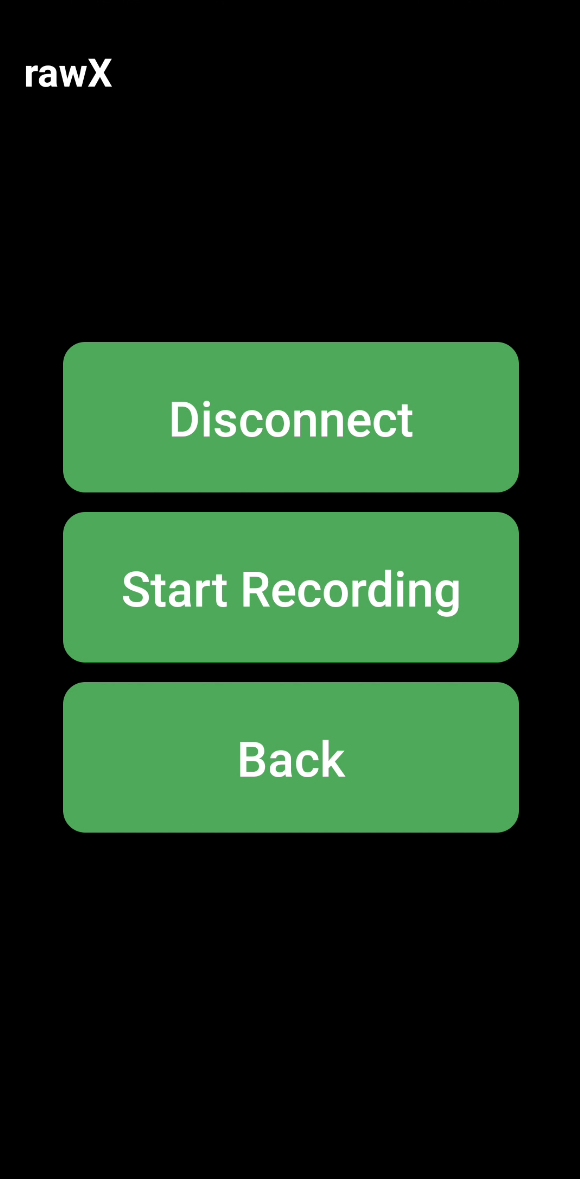
Fig.7 Starting the Static/Kinematic recording
A window then appears on screen where the Static/Kinematic mode can be set, namely the choice of:
- the name of the point or track to be surveyed
- the countdown time of the session, in seconds
- the instrument height, in metres
- the sound or vibration feedback at the end of the countdown, whether it ends naturally or is stopped by the user
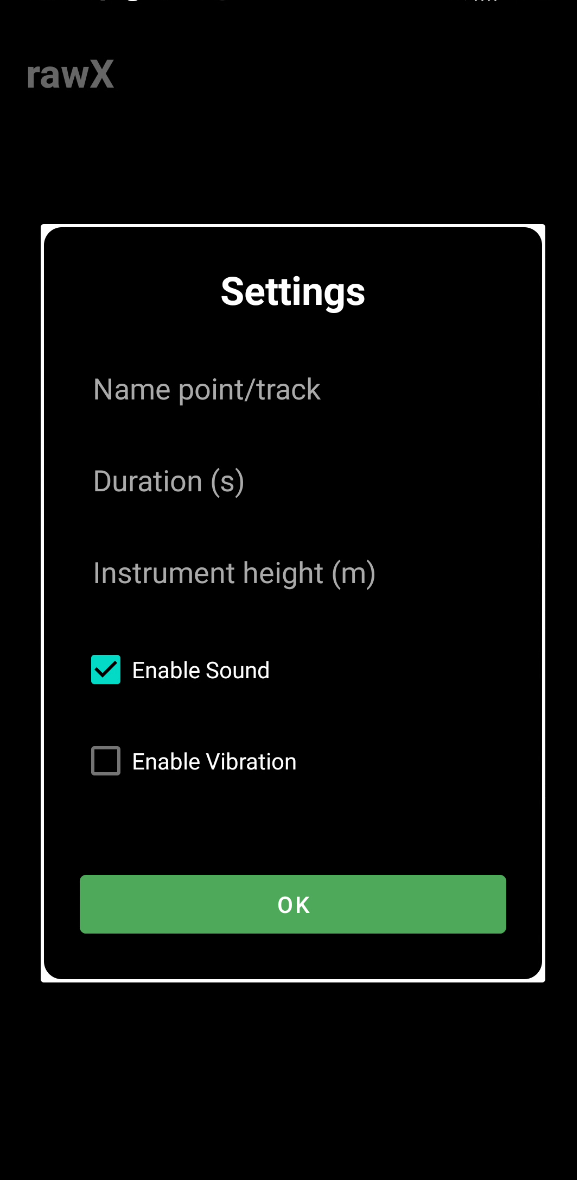
Fig.8 Settings for the Static/Kinematic recording
Once recording has started, the countdown in the seconds chosen earlier appears on screen, as in fig. 9 below
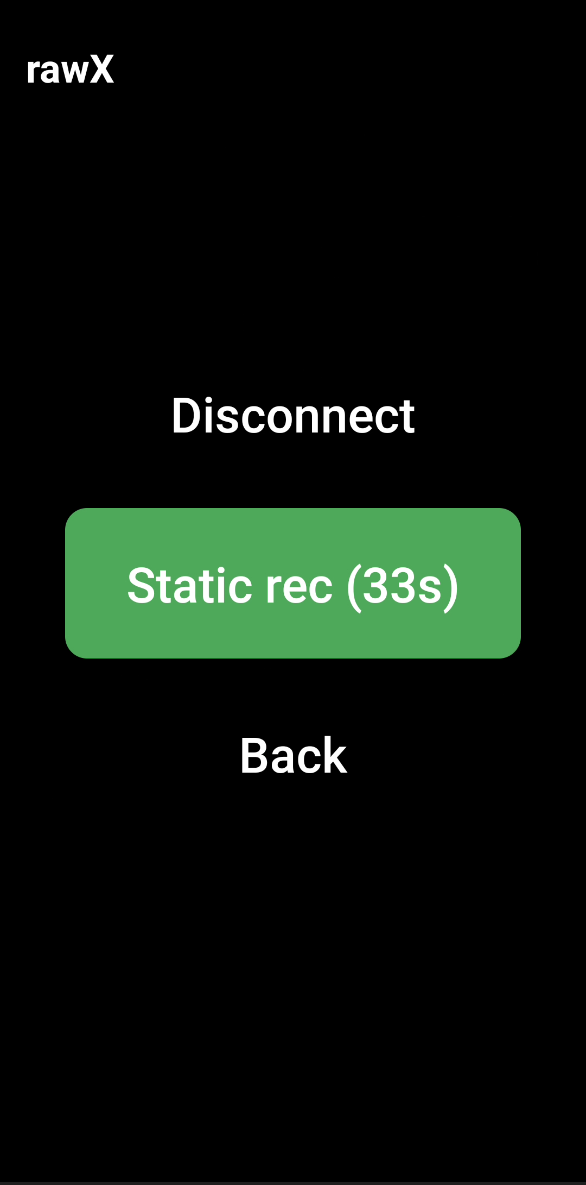
Fig.9 Countdown of the session
At the end of the session the recording is saved automatically in a folder holding:
- the chosen name of the point or track with the .ubx extension, for the raw data
- the chosen name of the point or track with the .csv extension, for the session log
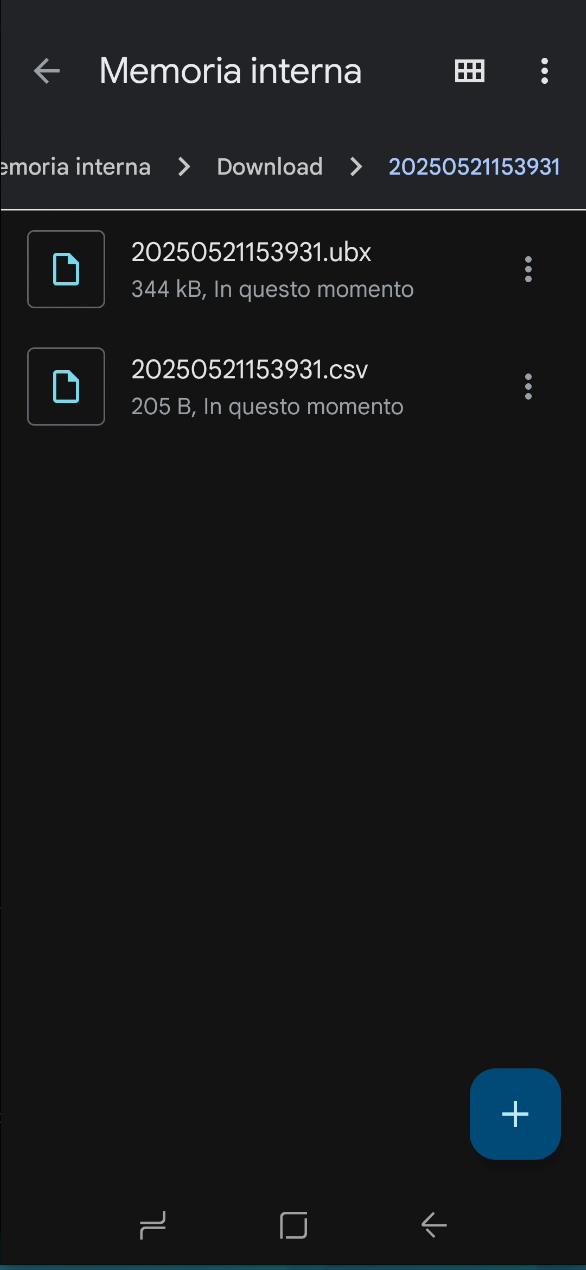
Fig.10 Saving the Static/Kinematic session
The figure below shows an example of the csv file that acts as the log file for Static/Kinematic mode
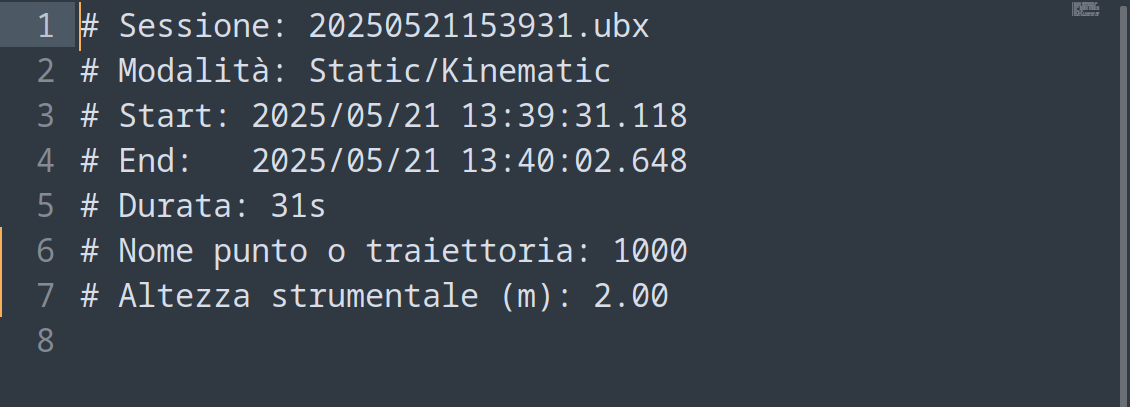
Fig.11 Log file, Static/Kinematic mode
Stop&Go mode
With the “Select Device” button, connect the app to the receiver over Bluetooth
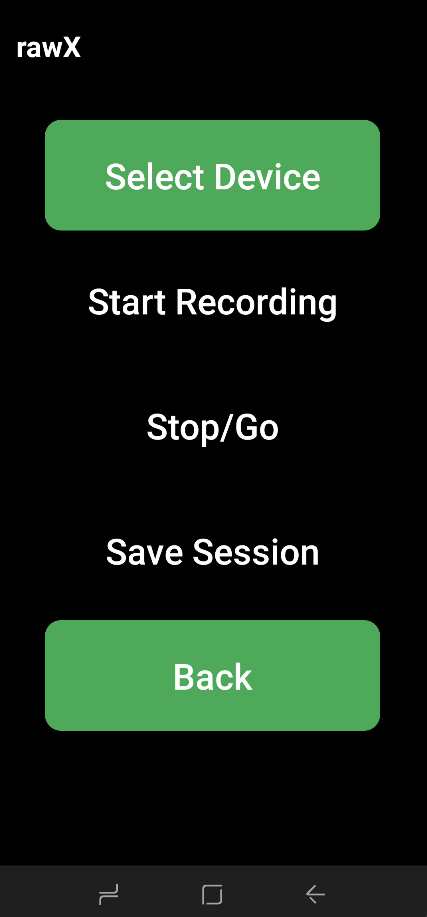
Fig.12 Select the external device
Choose a device already paired over Bluetooth
Fig.13 List of the available devices
The connection has a visual countdown
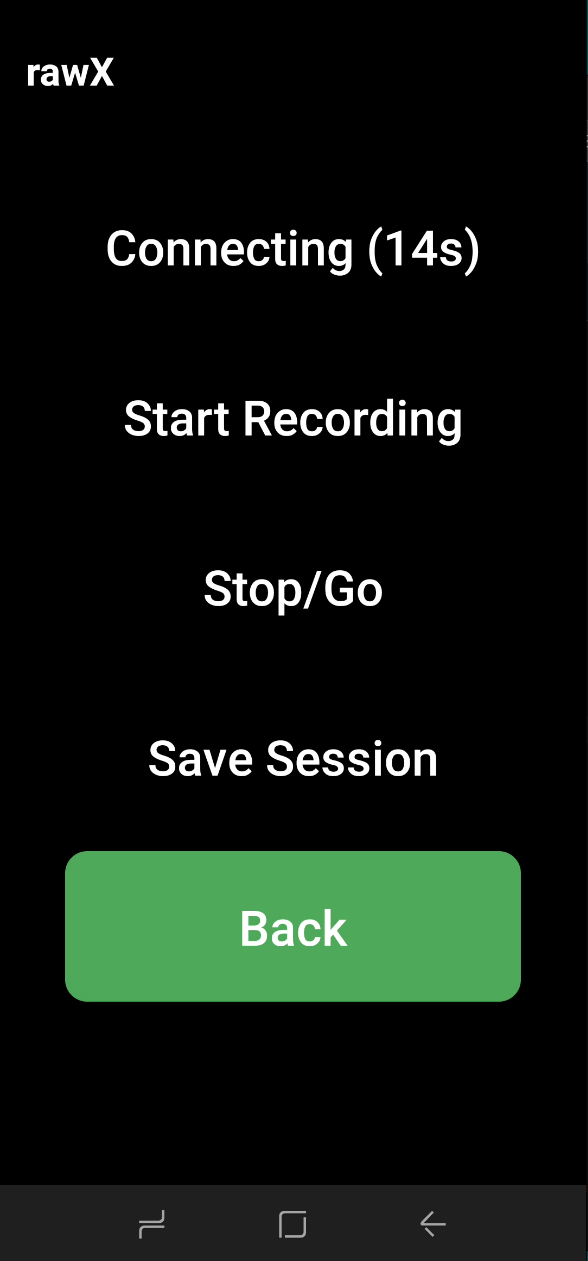
Fig.14 Connecting to the external device
Once the device has been chosen, in Stop&Go mode you can start recording by tapping “Start Recording”
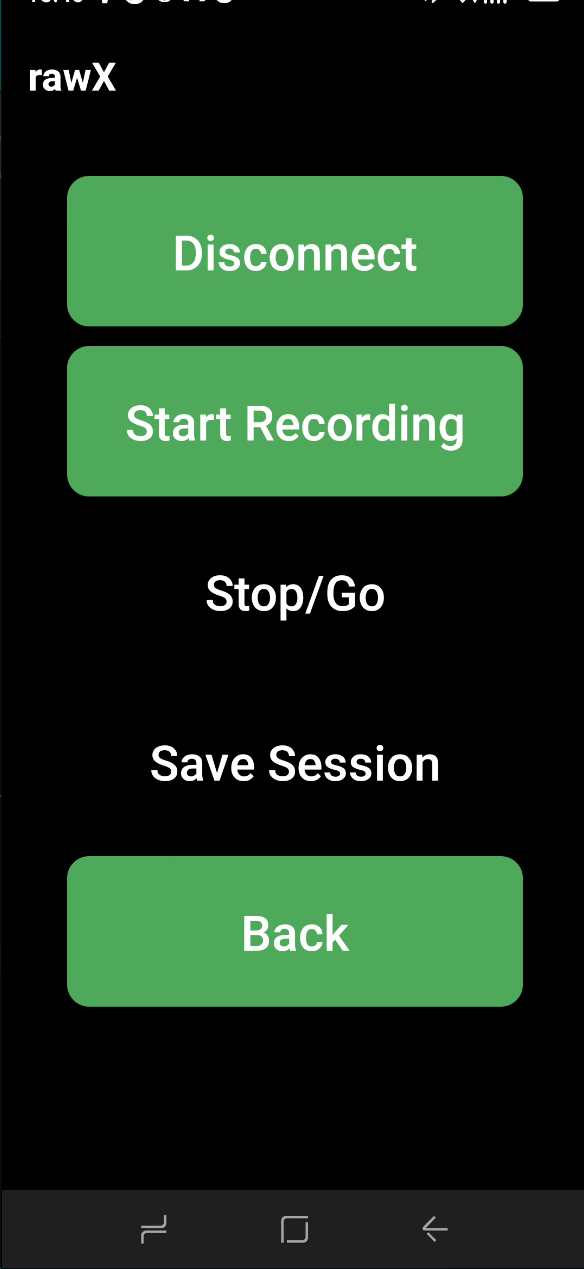
Fig.15 Starting the Stop&Go recording
A window then appears on screen from which the points to be surveyed in Stop can be started.
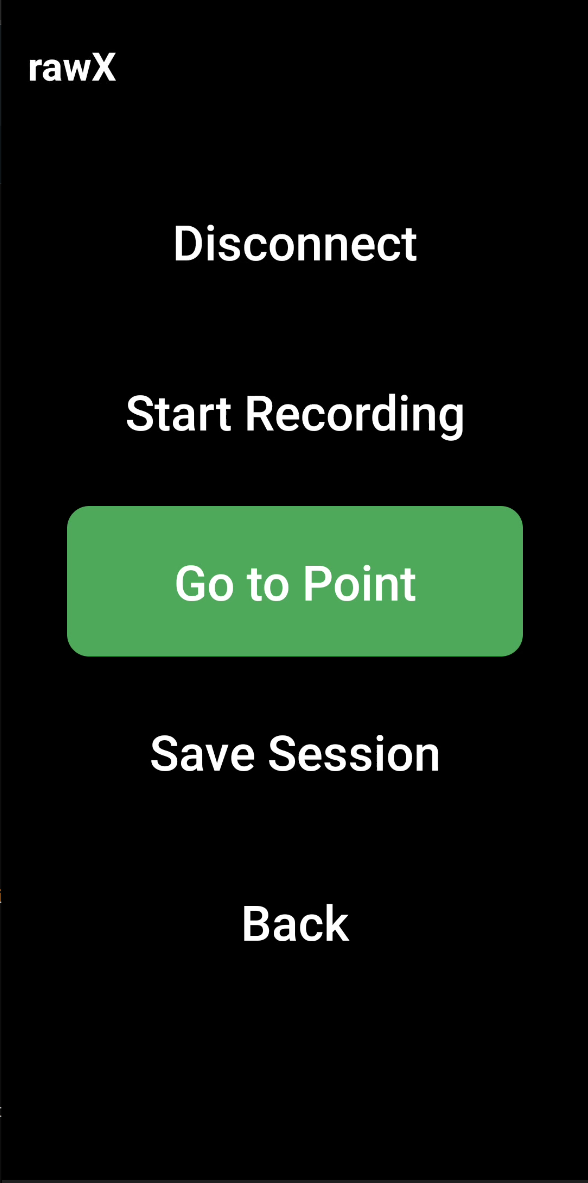
Fig.16 Starting the Stop&Go point acquisition
Tapping the only active button, “Go to Point”, brings up the stop&go parameters on screen, namely the choice of:
- the first sequential point to be surveyed
- the occupation time of each sequential point to be surveyed
- the instrument height, in metres, of each sequential point to be surveyed, as in Fig.16
- the sound or vibration feedback at the end of the countdown, whether it ends naturally or is stopped by the user
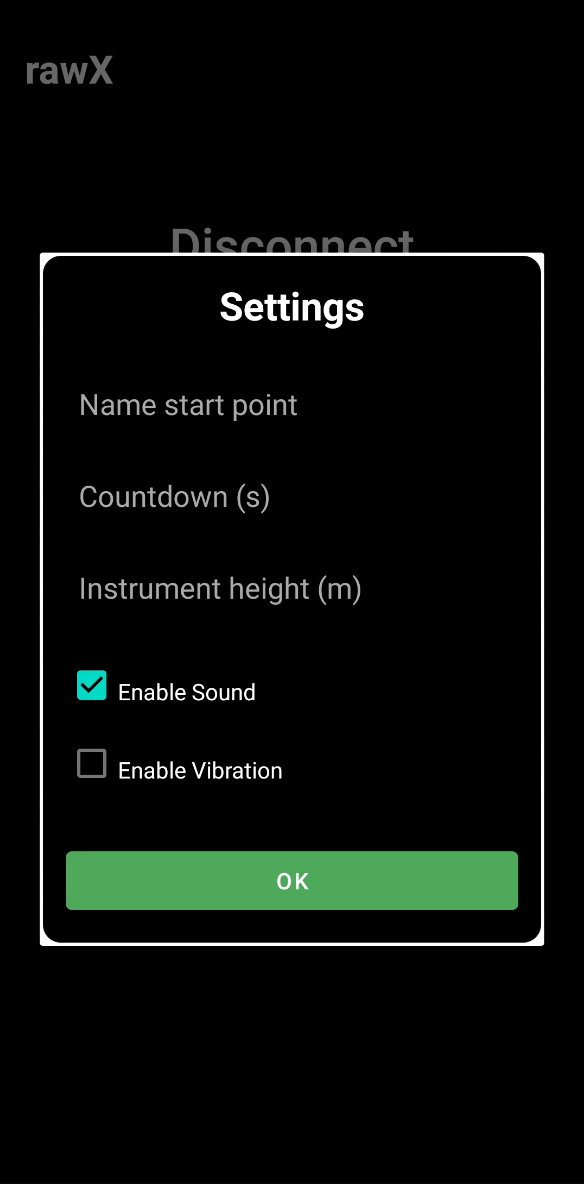
Fig.17 Settings for the Stop&Go recording
Note
Pressing and holding the “Go to Point” button at any moment shows the current state of the point still to be surveyed and the last settings chosen for the countdown and the instrument height, so that they can be changed at any time
Please note: the points are surveyed in sequence, starting from the first one entered.
Go on with the Stop by briefly tapping the “Go to Point” button, which starts recording the point and begins the countdown, as in Fig. 17 below
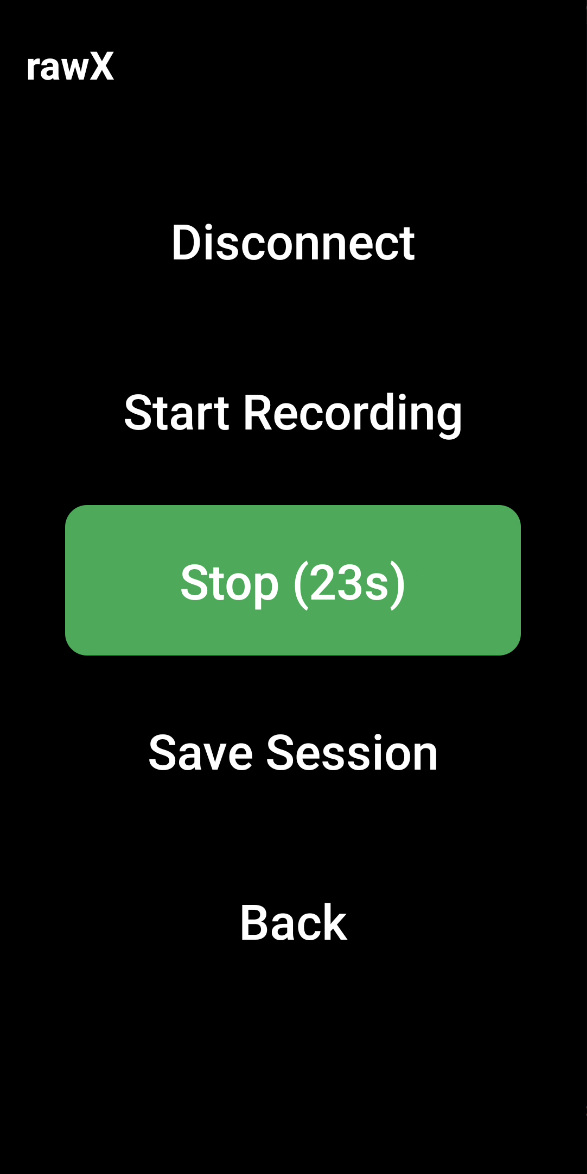
Fig.18 Starting the “stop” in Stop&Go
Once all the points have been surveyed, the whole session can be saved with the “Save Session” button, as in Fig.18 below
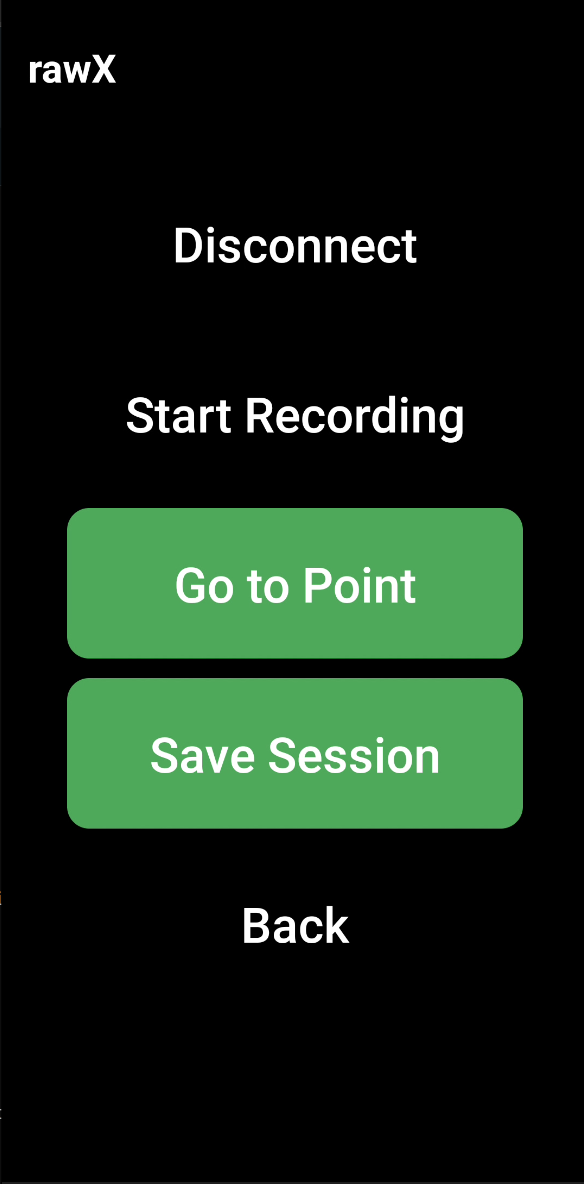
Fig.19 Saving the Stop&Go session
Note
The session is saved automatically in a folder named after the day, holding two files with: - the complete kinematic session in the proprietary raw .ubx format - the alternating Stop and Go intervals for each point surveyed
The figure below shows an example of the csv file that acts as the log file for Stop&Go mode
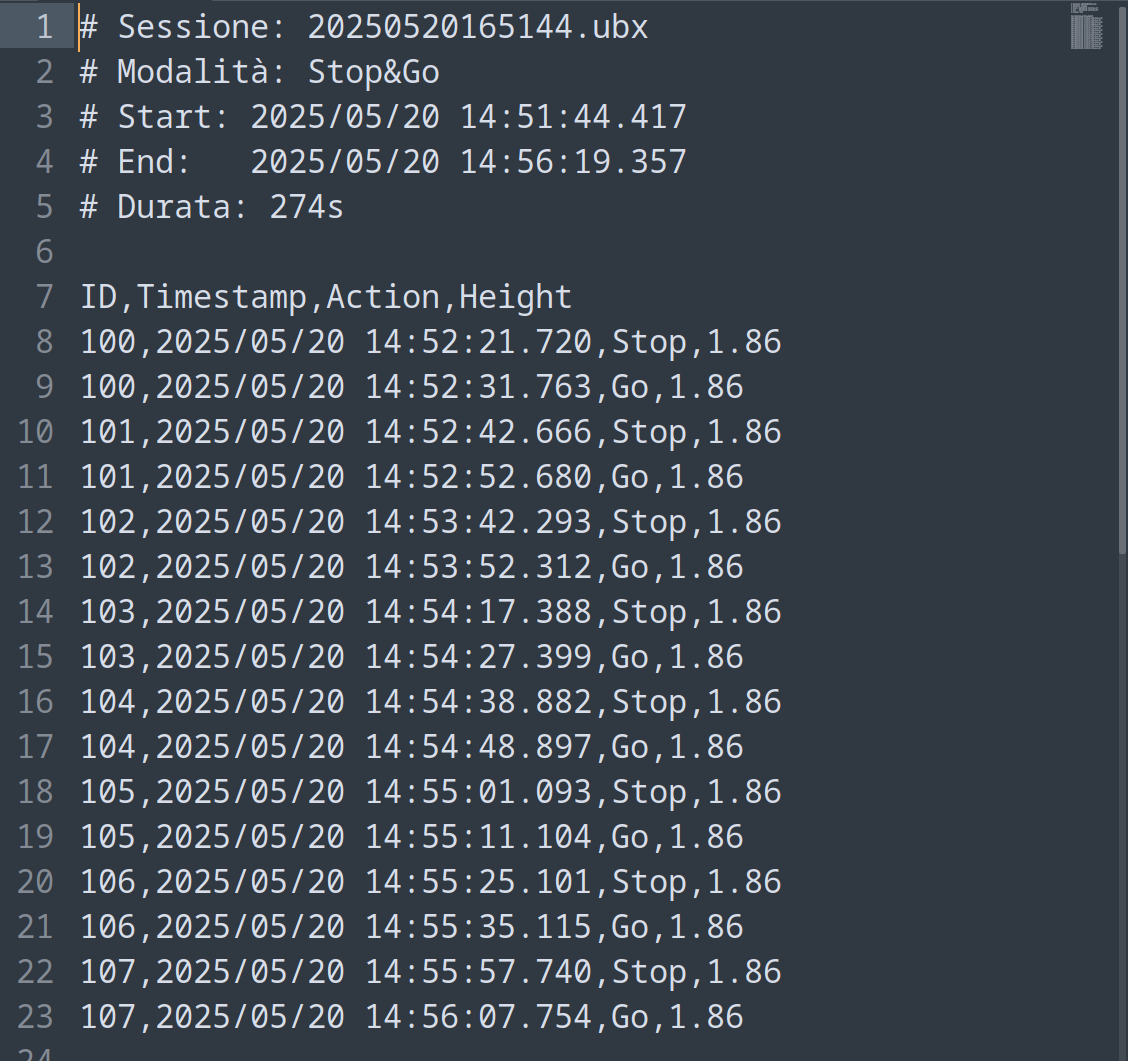
Fig.20 Log file, Stop&Go mode
At any moment you can go back to the mode selection menu with the “Back” button, present in both modes, or simply leave the app with the “Exit” button after confirming, as in the figure below
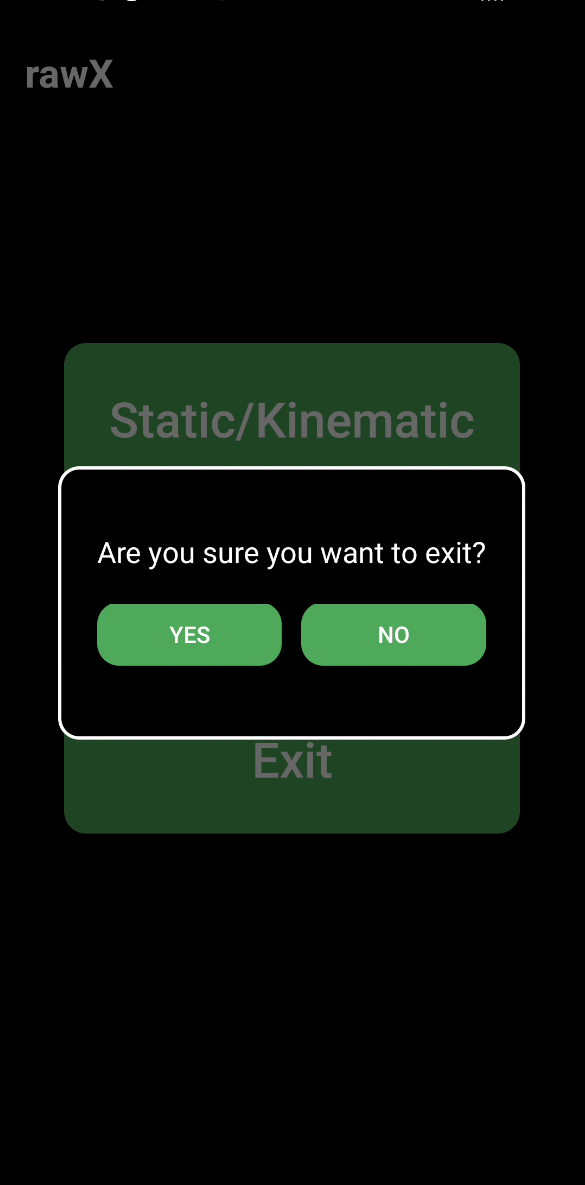
Fig.21 Leaving the rawX app
Tapping the name of the application at the top left shows:
- The name of the developer
- The version currently released
- The release date
- The developer’s e-mail address
- A short description of the app
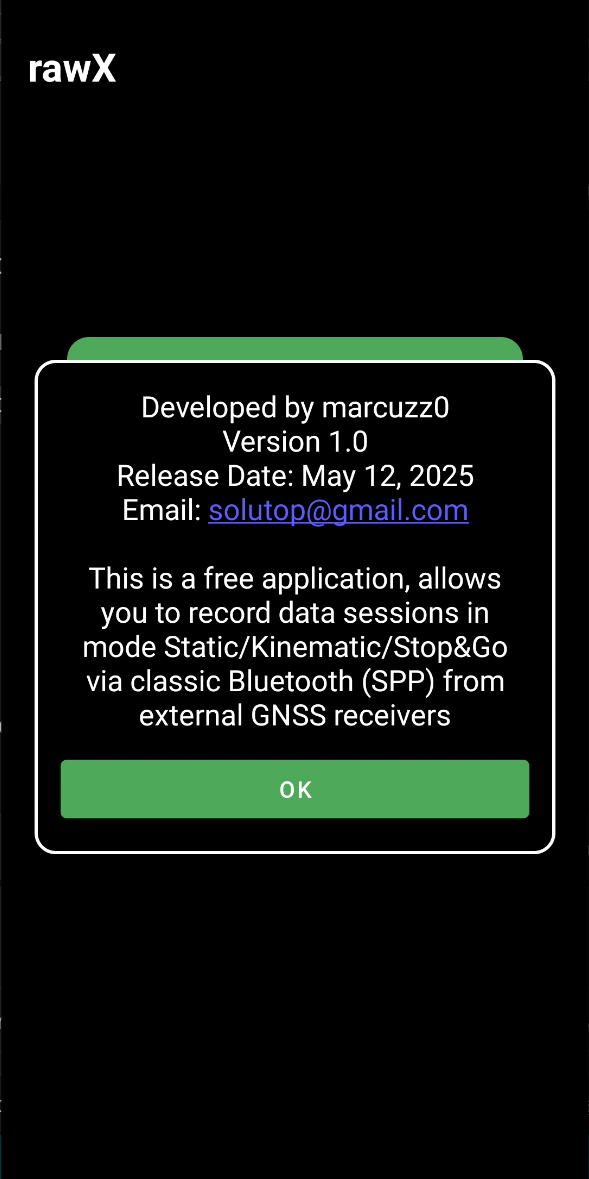
Fig.22 Information about the rawX app
Video
A video showing the features described above is here.